From Doubt To Clarity
Order your DNA Paternity Test Today!
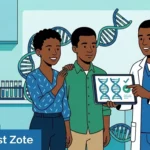
DNA Paternity Test – Kenya’s Most Affordable DNA Test
Understanding Samples Used for DNA Paternity Testing.
Home DNA Test Sample Collection offers a convenient, fast and simple way to collect your DNA samples. In today’s DNA testing arena, the whole process is designed to maximise the user experience and the accuracy of the test. There are many samples types that can be used for DNA testing. These include any human tissue or fluid that contains cells. Examples include blood, nail clippings, and hair, just to name a few.
However, one particular sample stands out – mouth swabs (buccal Swabs). Let’s look at how mouth swabs have revolutionised DNA testing in Kenya and the world at large.
Mouth Swabs – Revolutionary Sample type for DNA testing.
A mouth swab sample consists of cellular material harvested by rolling a brush-like device on the inside cheek. This is because they are non-invasive( no needle pricks), very fast se

Advantages of Mouth Swabs
- Easy to collect
- Fast – 30 seconds
- Non-invasive – No needle pricks or blood
- Very stable – remains intact during transportation.
Now that we understand what a mouth swab is, let us go to the actual process of collecting the sample.
Before you start: Gather all required Materials Needed
Ensure you have all you need
- DNA sample collection kit (you will receive from us).
- Clean hands and a clean, well-lit workspace.
- A mirror (optional, but it can help with swabbing the inside of your cheek).
Prefer instructions in a PDF? Click here
Steps in Home DNA Sample Collection:
1. Prepare the Kit:
- Open the sample collection kit and examine the contents. Our kit contains the following items:
- DNA collection swab, individually packaged in a white envelope. The envelope also indicates the name /Initials of the person to be tested
- Make sure you don’t mix up the envelopes!
- DNA Testing Request Form/Consent Form
- Ensure you fill and sign the form with all the required information.
- DNA collection swab, individually packaged in a white envelope. The envelope also indicates the name /Initials of the person to be tested
Read the instructions and any accompanying paperwork carefully before you begin.
2. Wash Your Hands:
Start by thoroughly washing your hands with soap and water to remove any contaminants.
3. Gather the Swabs:
Open the kit and locate the cheek swabs provided. They typically look like long cotton-tipped swabs. (see the image above.
4. Identify The Swab for each person to be tested
- You will receive 2 or more swabs, depending on the number of people being tested. We label them “Father” and Child #1″, Child #2″ etc.
- Make sure you match each kit to each person. We recommend opening one kit at a time, taking the swab, and returning it to its plastic packaging and envelope. Only then proceed to the next person.
- Avoid touching the cotton tip of the swab to prevent contamination.
5. Swab Inside Your Cheek:
- Using a mirror (if available) can help you locate the inside of your cheek more easily.
- Take one of the swabs and firmly rub it against the inside of your cheek. You should do this for about 15 seconds on one side.
- Be gentle but ensure that the swab collects enough cells. It’s common to feel a slight tingling sensation, but it should not be painful.
Repeat the same process on the other cheek with a new swab if required.
6. Secure the Swabs:
Once the swabs are dry, carefully place them back into the white sample envelopes. They put them in the provided tamper-proof mailer.
7. Fill out the DNA Test Request and Consent Form:
Fill out any required paperwork or forms that are included with the kit. This may include your personal information, consent, and other relevant details.
8. Send back the sample Kit to our Lab
Place the sealed sample container and any completed paperwork in the provided return envelope or package. We send the sample in a carton box, please use the same or similar packaging
Send your samples through Fargo Courier, G4S or another courier agreed with us.
That’s A wrap! Congratulations, You can now collect your DNA samples easily at Home
After mailing the sample, we will advise you once it’s received. Now you can sit back as we do the analysis.
It’s important to follow the instructions provided to the dot. This ensures quality, and adequate samples free of contamination.
Remember – In case you encounter any issues during the sampling process – be sure to contact us on WhatsApp
More Articles In The DNA Testing Series

DNA Self-Samples Collection Guide
Summary of DNA Self-Sample Collection Process Self-collection for DNA mouth samples is a safe, convenient…
DNA Siblingship Testing In Kenya
From Doubt To ClarityOrder your DNA Siblingship Test Today! BooK NOW Introducing Siblingship Testing This…
Vital Role Of DNA Maternity Testing In Kenya
From Doubt To ClarityOrder your DNA Maternity Test Today! BooK NOW Introduction To DNA Maternity Testing…
9 Common Reasons For DNA Paternity Tests
From Doubt To ClarityOrder your DNA Paternity Test Today! BooK NOW Paternity testing, also known…
DNA Paternity Testing in Kenya: Everything you need to know (Updated 2026)
Introduction to DNA Paternity Testing in Kenya DNA Paternity testing is the use of DNA…

Understanding the Outcomes of DNA Paternity Tests: 3 Possibilities You Need to Know
BooK NOW Understanding the Outcomes of DNA Paternity Tests When it comes to matters of…

What Are The Key Differences Between Peace of Mind And Court Ordered DNA Paternity Tests?
Introduction to peace of mind Vs legal DNA Paternity Testing There are 2 scenarios when…
DNA Paternity Testing Questions: Your Top 17 Queries Answered
reasons for DNA testing Overview of dna testing home dna sample collection DNA test results…
Key Qualities Of A Great DNA Testing Service Provider (Why Labtestzote DNA Testing Is A Great Choice!!).
DNA testing is a once-in-a-lifetime undertaking. There’s a lot at stake, and there can be…
Disclaimer
The information provided on this medical blog is for general informational purposes only and should not be considered as a substitute for professional medical advice. Always consult with a qualified healthcare provider before making any healthcare decisions or taking any actions based on the information provided on this blog. The authors and publishers of this blog are not liable for any errors or omissions in the content or for any actions taken based on the information provided.