

From Doubt To Clarity
Order your DNA Paternity Test Today!
DNA Paternity Test – Kenya’s Most Affordable DNA Test
Summary of DNA Self-Sample Collection Process
- Self-collection for DNA mouth samples is a safe, convenient and accurate.
- Rub the swab inside your mouth, leave the swabs for 5-10 min to dry.
- Package your swabs in the provided sample envelope.
- Send your samples to Labtest Zote via Fargo or G4S courier
Defining Self Sample Collection
Did you know you do not need to come physically to our laboratory for a peace of mind DNA test?
DNA Self Samples Collection is our proven solution for convenience, discreteness and cost-effectiveness. This guide will walk you through collecting your DNA sample using the provided mouth swabs.
For accurate results, please follow these steps carefully.
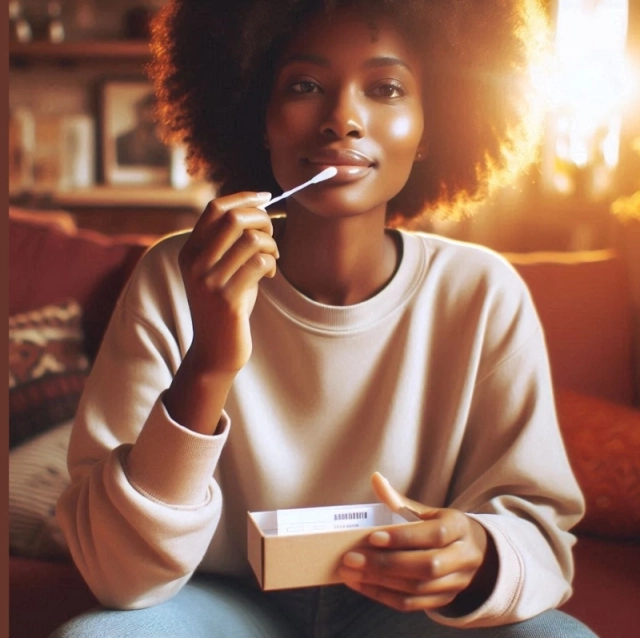
Requirements for DNA Self-Sample Collection
- Clean water (to wash your hands)
- Paper or a clean cloth towel
- This instruction sheet
- DNA Collection Kit containing:
- Individually packaged sterile swabs
- Sample collection envelopes (labeled with Name/ID)
- Tamper-proof Mailer
- Clean gloves (optional)
Before You Begin
- Do not eat, drink (except water), smoke, or chew gum for 30 minutes before collecting your sample. These activities can affect the quality of your DNA.
- Wash your hands thoroughly with soap and warm water for at least 20 seconds. Dry them completely with a clean paper towel.
- Optional- Wear the provided gloves to minimise the risk of contamination
DNA Self-Samples Collection: Step-by-Step Guide

Open one sample kit for one person at a time, take the sample, and seal it before going to the next person.
- Wash your hands and dry them with a towel.
- Wear the provided gloves -This is optional.
- Open one swab kit package at a time.
- Carefully tear open the foil pouch containing a single sterile swab. Do not touch the cotton tip of the swab.
- Swab the inside of the cheek: Firmly rub the cotton tip of the swab against the inside of one cheek for 10 seconds and about 5 times.
- Use a rolling motion and move the swab up and down to collect enough cells. Avoid touching your gums or tongue.
- Take 2 samples (one from each cheek).
- Place the swabs ON the envelope and let them stand to air dry for 5 minutes.
- Carefully place both swabs into the labelled sample collection envelope. Do not touch the cotton tip of the swab.
- Seal the self-sealing DNA sample envelope:
- Put all the sealed DNA Sample Envelopes into a brown A5 envelope and seal it.
- Finally, put the envelope into the provided tamper-proof mailer and seal it.
- Put the mailer into an A4 envelope and address it to us
Congratulations! You have successfully collected your DNA sample.
Final Steps: Labelling and Completing Consent Form
- Complete the provided consent form.
- Attach a copy of an identification document (ID or passport) and birth certificate (if not shared on email/WhatsApp)
- Package and return your sample: Make sure to use a carton box (a normal envelope is not enough) to protect the sample during transportation.
- Send the sample via courier (Fargo, SGA Courier) or another courier agreed upon
DNA Self-Sample Collection: Frequently Asked Questions
More Articles In The DNA Testing Series
What Are The Key Differences Between Peace of Mind And Court Ordered DNA Paternity Tests?
Introduction to peace of mind Vs legal DNA Paternity Testing There are 2 scenarios when…
DNA Paternity Testing Questions: Your Top 17 Queries Answered
reasons for DNA testing Overview of dna testing home dna sample collection DNA test results…

Understanding the Outcomes of DNA Paternity Tests: 3 Possibilities You Need to Know
BooK NOW Understanding the Outcomes of DNA Paternity Tests When it comes to matters of…

Paternity Test During Pregnancy in East Africa for Peace of Mind and Legal Purposes
A Comprehensive Guide To Prenatal Paternity Testing Questions about biological paternity can arise before…

Vital Role Of DNA Maternity Testing In Kenya
From Doubt To ClarityOrder your DNA Maternity Test Today! BooK NOW Introduction To DNA Maternity Testing…
Home DNA Test Sample Collection – Easy Step-by-Step Process
Understanding Samples Used for DNA Paternity Testing. Home DNA Test Sample Collection offers a convenient,…

Key Qualities Of A Great DNA Testing Service Provider (Why Labtestzote DNA Testing Is A Great Choice!!).
DNA testing is a once-in-a-lifetime undertaking. There’s a lot at stake, and there can be…
9 Common Reasons For DNA Paternity Tests
From Doubt To ClarityOrder your DNA Paternity Test Today! BooK NOW Paternity testing, also known…

DNA Siblingship Testing In Kenya
From Doubt To ClarityOrder your DNA Siblingship Test Today! BooK NOW Introducing Siblingship Testing This…
DNA Paternity Testing in Kenya: Everything you need to know (Updated 2026)
Introduction to DNA Paternity Testing in Kenya DNA Paternity testing is the use of DNA…
Disclaimer
The information provided on this medical blog is for general informational purposes only and should not be considered as a substitute for professional medical advice. Always consult with a qualified healthcare provider before making any healthcare decisions or taking any actions based on the information provided on this blog. The authors and publishers of this blog are not liable for any errors or omissions in the content or for any actions taken based on the information provided.